

📢 Disclosure: This post contains affiliate links. We may earn a commission at no extra cost to you. We only recommend products we genuinely believe in.
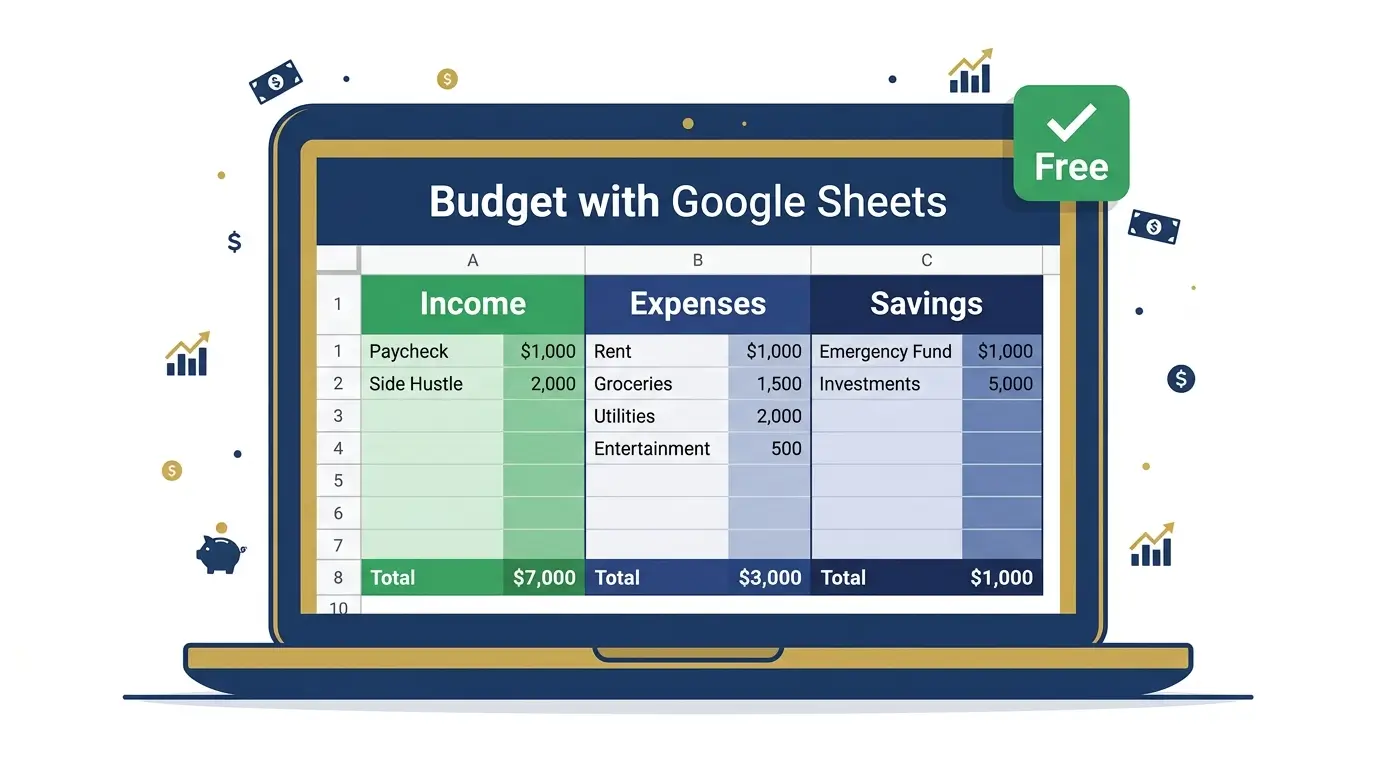
Google Sheets is one of the most powerful — and most underrated — budgeting tools available in 2026. It’s completely free, works on any device, saves automatically to the cloud, and gives you total control over how your budget looks and functions. No subscription fees, no data sharing, no limits.
Whether you’ve tried budgeting apps that never stuck or you’re building your first budget from scratch, this guide walks you through exactly how to use Google Sheets for budgeting—step by step, with every formula you need.
If you haven’t decided on a budgeting method yet, read our guides on the 50/30/20 budget rule and zero-based budgeting before setting up your spreadsheet—your method shapes your categories.
Why Use Google Sheets for Budgeting?
There are dozens of budgeting apps and tools available in 2026 — so why choose Google Sheets? Here’s what makes it stand out:
- Completely free — no subscription, no premium tier, no hidden costs
- Works everywhere — access your budget from your phone, tablet, or any computer
- Fully customizable — build it exactly the way you want, with your categories and your layout
- Auto-saves to Google Drive — your data is never lost
- Easy to share — share with a partner or spouse in real time
- No ads, no data selling — your financial data stays private
- Simple formulas — basic math functions like SUM and IF do everything you need
If you haven’t yet decided on a budgeting method, our guides on the 50/30/20 budget rule and zero-based budgeting will help you pick the right approach before building your spreadsheet.
Step 1 — Open Google Sheets and Create a New File
To get started with how to use Google Sheets for budgeting, all you need is a free Google account.
- Go to sheets.google.com and sign in with your Google account
- Click the + Blank button to create a new spreadsheet
- Click on “Untitled spreadsheet” at the top left and rename it: “Monthly Budget — [Month] [Year]” (e.g. “Monthly Budget — June 2026”)
- Your file is now automatically saved to Google Drive — no manual saving needed
You’re now looking at a blank grid of rows and columns. Each box is called a “cell” and is identified by a letter (column) and number (row) — for example, cell A1 is the top-left corner.
Step 2 — Set Up Your Budget Categories
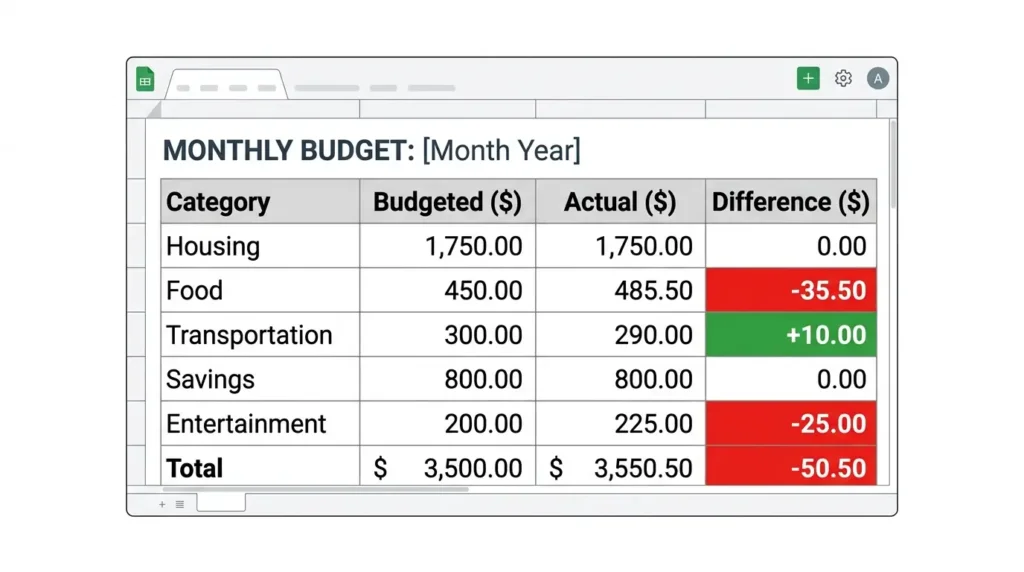
The foundation of your Google Sheets budget is your category structure. Here’s a proven layout that works for most people. Type each item into the cell listed:
Column Headers (Row 1)
- A1: Category
- B1: Budgeted Amount
- C1: Actual Amount
- D1: Difference
Income Section (Rows 2–5)
- A2: INCOME
- A3: Paycheck #1
- A4: Paycheck #2 (if applicable)
- A5: Other Income
- A6: TOTAL INCOME
Expenses Section (Rows 8–25)
- A8: EXPENSES
- A9: Rent / Mortgage
- A10: Utilities (electric, gas, water)
- A11: Internet / Phone
- A12: Groceries
- A13: Transportation (gas, transit)
- A14: Car Payment / Insurance
- A15: Health Insurance / Medical
- A16: Subscriptions (streaming, apps)
- A17: Dining Out / Takeout
- A18: Entertainment
- A19: Clothing / Personal Care
- A20: Debt Payments (credit cards, loans)
- A21: Savings Transfer
- A22: Emergency Fund Contribution
- A23: Miscellaneous
- A24: TOTAL EXPENSES
Summary Section (Rows 26–28)
- A26: NET (Income minus Expenses)
- A27: Savings Rate %
- A28: Status
Step 3 — Enter Your Income and Expense Amounts
In column B (Budgeted Amount), enter what you plan to spend or earn each month. Use your last 2–3 months of bank statements to get realistic numbers for each category. Common mistakes to avoid:
- Don’t underestimate groceries — most people spend 20–30% more than they think
- Include annual expenses divided by 12 (car registration, insurance renewals, holiday gifts)
- List your savings transfer as an expense — it’s money leaving your checking account on payday
- Include your emergency fund contribution as a separate line item so it’s intentional, not an afterthought
In column C (Actual Amount), you’ll fill in real numbers throughout the month as you spend. Leave this blank for now and update it weekly.
Step 4 — Add Key Formulas
This is where Google Sheets does the work for you. Here are the essential formulas to add — just click the cell and type the formula exactly as shown:
Total Income (Cell B6)
=SUM(B3:B5)This adds up all your income sources automatically. Copy this formula to C6 for actual income totals.
Total Expenses (Cell B24)
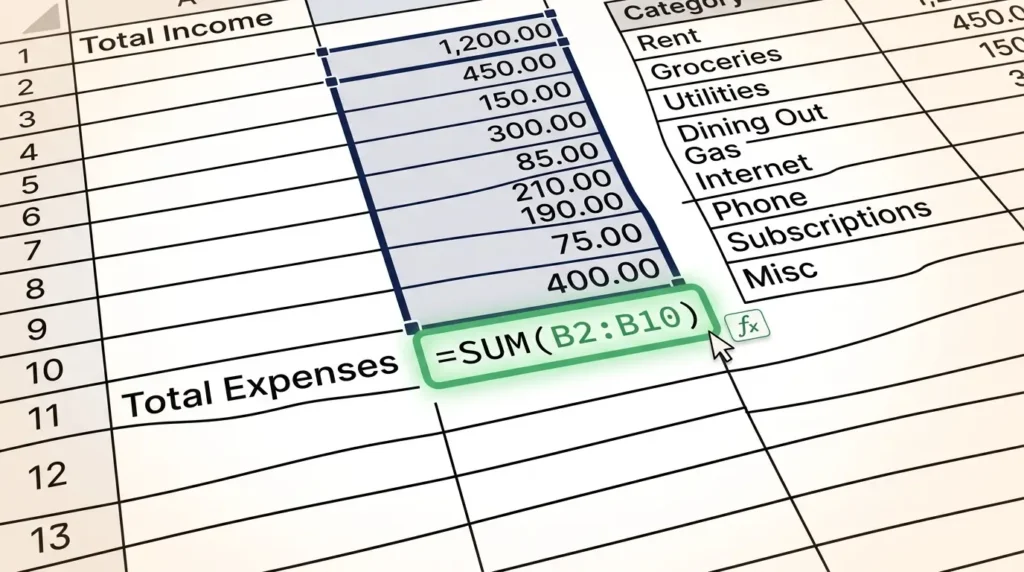
=SUM(B9:B23)This adds up all your expense categories. Copy this formula to C24 for actual expense totals.
Difference Column (Cell D9, then copy down)
=B9-C9This shows how much you’re over or under budget for each category. A positive number means under budget (good). A negative number means over budget (needs attention). Copy this formula from D9 all the way down to D23.
Net Balance (Cell B26)
=B6-B24This is your bottom line: total income minus total expenses. If positive, you’re living within your means. If negative, you’re overspending and need to adjust categories.
Savings Rate (Cell B27)
=B21/B6Format this cell as a percentage (Format → Number → Percent). This shows what percentage of your income you’re saving. The goal for most people following the 50/30/20 rule is 20% or more.
Step 5 — Format Your Budget to Make It Easy to Read
A well-formatted budget is one you’ll actually use. Here are quick formatting tips:
- Bold the header row — select row 1, press Ctrl+B
- Color section headers — highlight “INCOME”, “EXPENSES”, “NET” rows in navy or dark green to separate sections visually
- Format currency — select all number cells, go to Format → Number → Currency
- Freeze the header row — View → Freeze → 1 row, so headers stay visible when you scroll
- Color the Difference column — use conditional formatting (Format → Conditional formatting) to automatically turn positive differences green and negative ones red
Step 6 — Duplicate for Each Month
Once your first month is set up, you don’t need to start from scratch. Right-click the sheet tab at the bottom (it probably says “Sheet1”) and select “Duplicate”. Rename the new tab to the next month and clear the “Actual Amount” column (C) while keeping all your budgeted amounts and formulas. This creates a rolling monthly budget tracker in one file.
Google Sheets Budget Template — Exact Structure to Copy
Here’s a clean visual summary of the complete budget layout so you can replicate it exactly:
| A                          | B          | C        | D          |
|----------------------------|------------|----------|------------|
| Category                   | Budgeted   | Actual   | Difference |
| INCOME                     |            |          |            |
| Paycheck #1                | $3,200     |          |            |
| Paycheck #2                | $1,500     |          |            |
| Other Income               | $200       |          |            |
| TOTAL INCOME               | =SUM(B3:B5)|=SUM(C3:C5)|           |
|                            |            |          |            |
| EXPENSES                   |            |          |            |
| Rent / Mortgage            | $1,200     |          | =B9-C9     |
| Utilities                  | $150       |          | =B10-C10   |
| Internet / Phone           | $100       |          | =B11-C11   |
| Groceries                  | $400       |          | =B12-C12   |
| Transportation             | $200       |          | =B13-C13   |
| ...                        |            |          |            |
| TOTAL EXPENSES             |=SUM(B9:B23)|=SUM(C9:C23)|          |
|                            |            |          |            |
| NET                        | =B6-B24    |          |            |
| Savings Rate %             | =B21/B6    |          |            |
| Status                     |=IF(B26<0,"Over Budget","On Track")|  |
Google Sheets vs Budgeting Apps — Which Is Better?
A common question for beginners. Here’s an honest comparison:
| Google Sheets | Budgeting Apps (YNAB, Mint, etc.) | |
|---|---|---|
| Cost | Free | $5–$15/month |
| Bank sync | Manual entry | Automatic |
| Customization | Total control | Limited to app’s structure |
| Privacy | Your Google account only | Data shared with app |
| Setup time | 30–60 minutes | 10–15 minutes |
| Learning curve | Low (basic formulas) | Very low |
| Best for | Control, privacy, zero cost | Convenience, automation |
The honest verdict: If you want a free, private, fully customizable budget with no ongoing costs, Google Sheets wins. If you want automatic bank syncing and the fastest possible setup, a budgeting app like YNAB or a free alternative may suit you better. Read our guide on the best budgeting apps 2026 for a full comparison.
Many people start with Google Sheets to understand their finances, then graduate to an app — or stick with Sheets permanently because it gives them exactly what they need.
How to Use Google Sheets for Budgeting as a Couple
Budgeting together is one of the most impactful things couples can do for their financial life — and Google Sheets makes it easy.
Setting up shared access: Click the Share button (top right) → enter your partner’s email → give them Editor access so you can both update the budget in real time. Changes sync instantly.
Recommended structure for couples:
Add two income rows (one per person) instead of one. Split expenses into three categories: shared expenses (rent, groceries, utilities), Partner 1’s personal spending, and Partner 2’s personal spending. This makes it clear what’s shared vs. individual without anyone feeling monitored.
Tips for budgeting as a couple:
- Set a standing monthly “budget “date”—30 minutes to review the previous month together
- Agree on a “no-questions-asked” personal spending allowance for each person
- Track shared savings goals (emergency fund, vacation, home down payment) visibly in the sheet—watching the number grow together is motivating
- Use the 50/30/20 rule as a starting framework for how to split needs vs. wants vs. savings
How to Use Your Budget Every Week
Building the spreadsheet is the easy part. Using it consistently is what creates results.
Payday: Update your income in column C, confirm your savings transfer went through, and verify all bills are scheduled.
Every Sunday (10 minutes): Open your budget, check your bank statement, and update column C with the week’s actual spending.
End of month: Review your totals. Which categories went over? Which came in under? Use that data to adjust next month’s budgeted amounts.
This weekly habit is one of the most powerful financial changes you can make. Research consistently shows that people who actively track their spending spend 15–20% less than those who don’t—simply because awareness changes behavior. If overspending is a recurring issue, read our guide on how to stop living paycheck to paycheck.

Essential Google Sheets Budget Formulas — Cheat Sheet
| Formula | What It Does | Where to Use It |
|---|---|---|
=SUM(B3:B5) | Adds a range of cells | Total income, total expenses |
=B9-C9 | Subtracts actual from budgeted | Difference column per category |
=B6-B24 | Income minus expenses | Net balance |
=B21/B6 | Savings as % of income | Savings rate tracker |
=IF(B26<0,"Over Budget","On Track") | Status based on net | Status cell |
=AVERAGE(B9:B23) | Average monthly expense | Expense analysis |
=MAX(B9:B23) | Largest expense category | Identify biggest cost |
=COUNTIF(D9:D23,"<0") | Count over-budget categories | Monthly review |
Google Sheets Budget Tips for Beginners
Start simple. A basic income/expenses/difference layout is all you need. Don’t add complexity until you’ve used the simple version for at least one full month.
Use real numbers. Look at your last 3 months of bank statements for accurate category averages — guessing leads to a budget that doesn’t reflect reality.
Budget for irregular expenses. Divide annual costs (car registration, holiday gifts, insurance renewals) by 12 and include them as monthly line items. This prevents “surprise” expenses that blow your budget.
Track actuals weekly, not daily. Daily tracking feels like a chore and leads to abandonment. A 10-minute Sunday review is sustainable long-term.
Don’t aim for perfection. If you go over in a category, adjust and move on. The goal is awareness and improvement, not punishment.
Add a savings goals section. Track your emergency fund balance and specific savings goals directly in your budget. Watching the numbers grow is one of the best motivators to keep going.
Once your budget consistently shows monthly savings, read our guide on how to build an emergency fund for the recommended first destination — and debt consolidation explained if high-interest debt is your biggest monthly drain.
Frequently Asked Questions
Is Google Sheets good for budgeting?
Yes — Google Sheets is one of the best free budgeting tools available. It’s fully customizable, works on any device, automatically saves to the cloud, and uses simple formulas that anyone can learn in minutes. Unlike budgeting apps, it has no subscription fees and gives you complete control over your data.
What formulas do I need for a Google Sheets budget?
The only formulas you need to start are: =SUM() to total income and expenses, a simple subtraction (=B9-C9) to calculate the difference between budgeted and actual amounts, and =B6-B24 for your net balance. These three formulas handle 90% of what a basic monthly budget needs.
How do I make a monthly budget in Google Sheets?
Open Google Sheets, create a new blank spreadsheet, and set up four columns: Category, Budgeted Amount, Actual Amount, and Difference. List your income sources and expense categories in column A, enter your planned amounts in column B, and use SUM formulas for totals. Then update the Actual Amount column weekly as you spend.
Can I share my Google Sheets budget with my partner?
Yes. Click the “Share” button in the top right corner of Google Sheets and enter your partner’s email address. You can give them edit access so you both update the budget in real time or view-only access if you prefer to manage it yourself and share progress. Changes sync instantly for both users.
Is Google Sheets budgeting better than budgeting apps?
It depends on your preference. Google Sheets is free, fully customizable, and private — but requires manual entry and some setup. Budgeting apps often connect to your bank automatically and require less setup, but may cost $5–$15/month and share your data with third parties. For beginners who want full control at zero cost, Google Sheets is an excellent starting point.
How often should I update my Google Sheets budget?
Update your actual spending once a week — a 10-minute Sunday review is the most sustainable habit. Daily tracking tends to feel burdensome and gets abandoned. At month-end, spend 15 minutes reviewing totals and adjusting the next month’s budgeted amounts based on what you learned.
Can I use Google Sheets budget on my phone?
Yes. Download the free Google Sheets app (iOS or Android) and your budget is accessible from any device. Changes sync automatically across all devices. The mobile experience is slightly more limited than desktop for formatting, but fully functional for viewing and updating numbers on the go.
How do I track irregular expenses in Google Sheets?
Add a dedicated row called “Irregular / Annual Expenses” and divide your yearly costs (car registration, insurance renewals, holiday gifts, annual subscriptions) by 12. Budget that monthly amount so irregular expenses never catch you off guard. You can also create a separate tab called “Annual Expenses Tracker” to list each irregular expense and its monthly equivalent.
What’s the difference between zero-based budgeting and the 50/30/20 rule in Google Sheets?
The structure is the same — income, expenses, difference, net — but the category groupings differ. Zero-based budgeting assigns every dollar a job until your net equals zero, so you’d add a “Remaining to Assign” tracker. The 50/30/20 rule groups expenses into Needs (50%), Wants (30%), and Savings (20%), so you’d add subtotals for each group. Read our guides on zero-based budgeting and the 50/30/20 rule to decide which approach fits your situation.
How do I use Google Sheets to track savings goals?
Add a “Savings Goals” section below your main budget with rows for each goal (emergency fund, vacation, down payment). In each row, track the target amount, amount saved so far, and remaining balance using a simple subtraction formula. Update the “amount saved” column each month when you transfer money. Watching each goal grow over time is one of the most motivating parts of the process.
Final Thoughts: Your Budget Is Only as Good as Your Consistency
Knowing how to use Google Sheets for budgeting gives you a powerful, free tool — but the real value comes from using it every week. A budget you build and never look at changes nothing. A budget you review weekly and adjust monthly transforms your relationship with money over time.
Set up your spreadsheet today, fill in your numbers honestly, and commit to a 10-minute weekly review. Within 30 days, you’ll have more clarity about your finances than most people achieve in a year.
Once your budget consistently shows monthly savings, your next priorities are building your emergency fund, tackling high-interest debt (read our guide on how to get out of credit card debt), and starting to invest—beginning with just $100 if needed.