

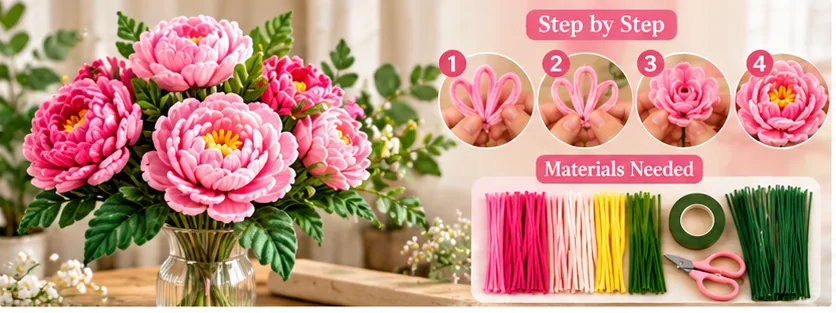
A pipe cleaner peony is a beautiful handmade flower project if you want a fuller, more layered bloom than a simple daisy or tulip. The secret is building the flower from several rings of petals, starting small in the center and gradually making each layer wider and looser.
This step-by-step tutorial shows you how to make a realistic-looking chenille stem peony for bouquets, gifts, desk decor, and floral arrangements. The project takes more pipe cleaners than many basic flowers, but the repeated petal technique is easy to learn.
Pipe Cleaner Peony Materials
- Pink, blush, red, white, or cream pipe cleaners for petals
- Green pipe cleaners for leaves and sepals
- One sturdy floral stem or stem wire
- Floral tape
- Artificial stamens, optional
- Scissors or wire cutters
- Hot glue gun, optional for reinforcement
- Ruler
For one full peony, prepare a generous supply of petal-colored chenille stems. A dense flower uses many more pieces than a small beginner bloom because the realistic effect comes from overlapping layers.
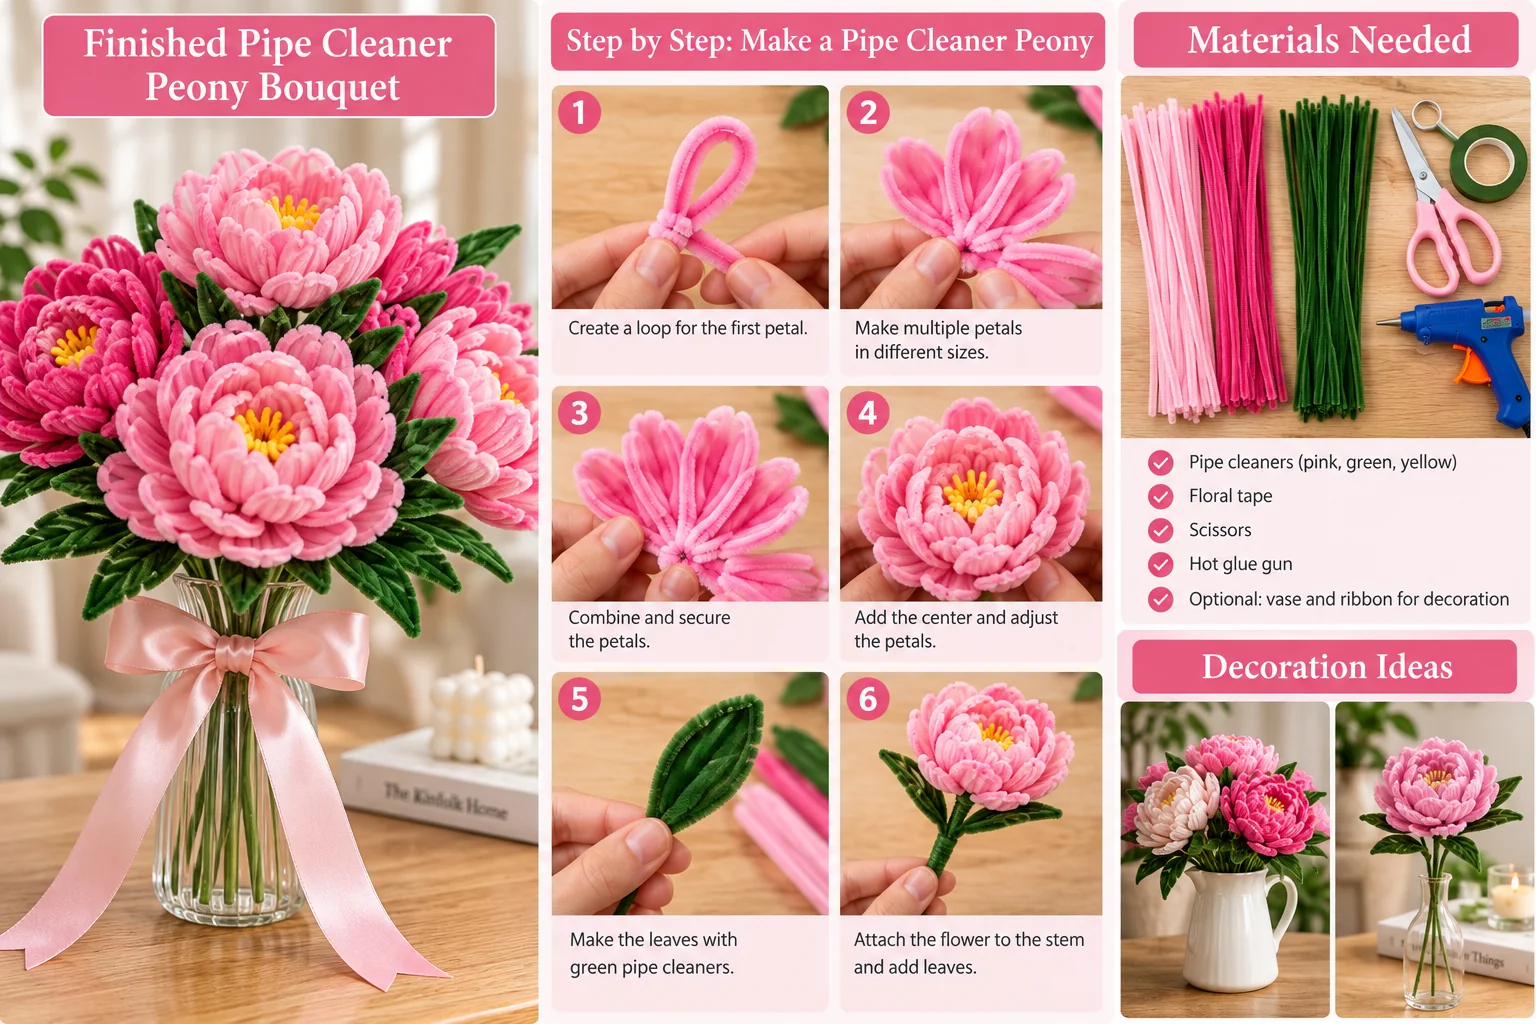
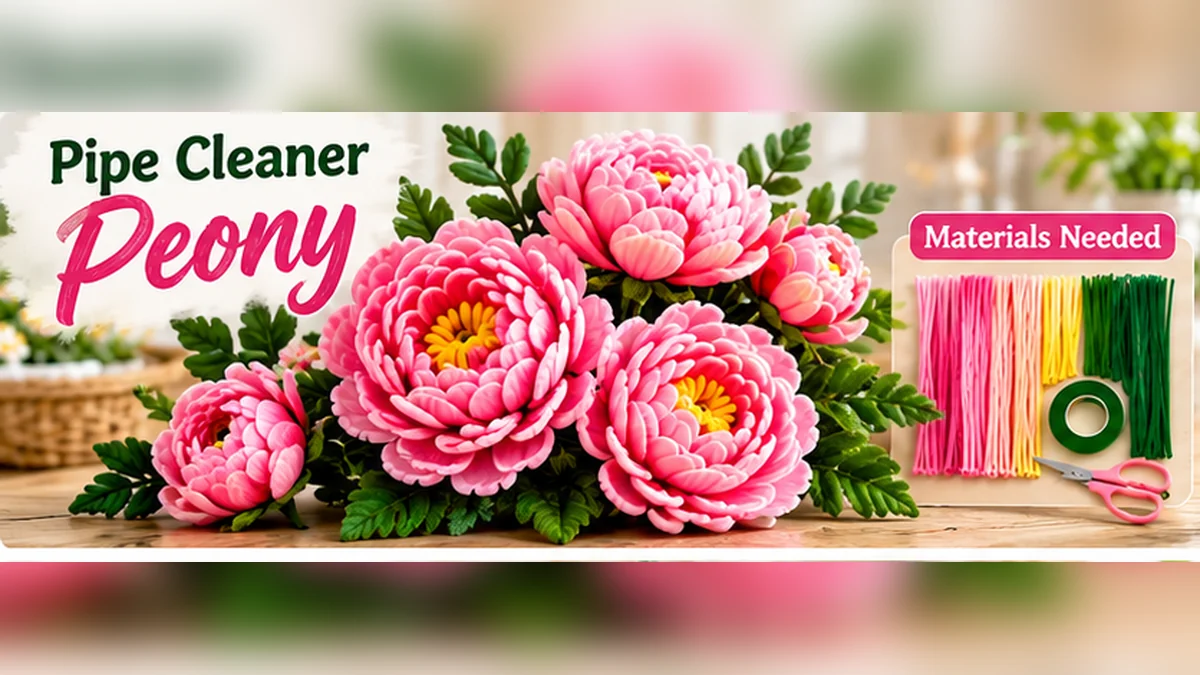
How a Pipe Cleaner Peony Gets Its Shape
A peony should not look like one flat ring of identical petals. The center is compact, the middle petals begin to open, and the outside petals are broader and more relaxed. Think of the flower as four zones: a tight center, small inner petals, medium petals, and large outer petals.
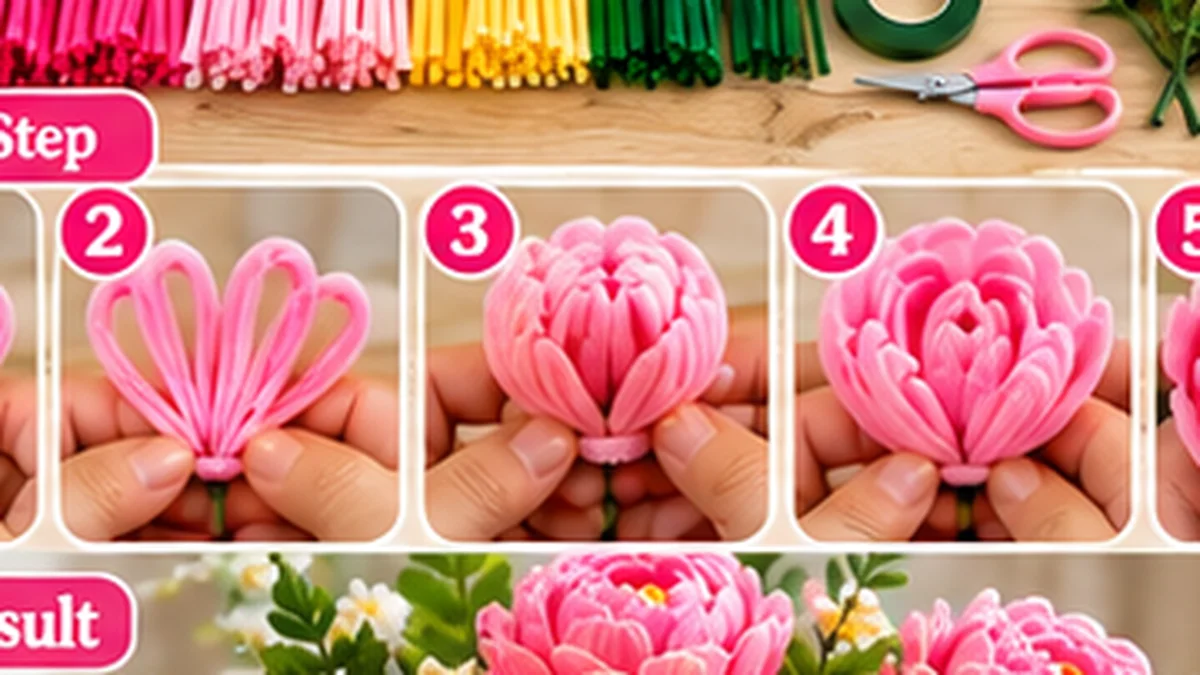
Step 1: Make the Peony Center
Begin with a short section of your petal color. Coil or fold it into a small rounded center. If you are using artificial stamens, gather a small bundle and secure it to the floral stem first, then build the petals around it.
Keep this first section compact. A center that is too wide makes the finished flower look open before the outer layers are added.
Step 2: Shape the Small Inner Petals
Fold short sections of pipe cleaner into narrow loops. Pinch the bottom of each loop and gently round the top with your fingers. Arrange the first petals closely around the center so they partially overlap.
Do not try to make every loop identical. Slight differences in height and curve help create the soft, irregular look of a real peony.
Step 3: Add the Second Petal Layer
Create another group of petals slightly larger than the first. Place each new petal between two petals from the inner ring rather than directly behind them. This staggered placement hides gaps and makes the flower look fuller.
Step 4: Build the Medium Petals
For the middle of the peony, make wider loops and allow the tops to lean outward. Secure them around the base one at a time or in small groups. Rotate the flower as you work and check it from every side.
If one side looks flat, add a petal in that area before moving to the final layer.
Step 5: Add the Large Outer Petals
The outer petals create the recognizable fluffy peony silhouette. Make these loops larger and less tightly curved. Position them lower around the flower head and gently bend their upper edges away from the center.
Avoid pulling every outer petal to the same angle. Some can sit almost horizontally while others remain slightly upright. This variation creates a more natural bloom.
Step 6: Make Green Sepals
Use green pipe cleaner to form several pointed loops underneath the flower. These small green pieces cover the petal connections and make the transition from bloom to stem look cleaner.
Step 7: Attach the Flower to the Stem
Secure the flower head firmly to a floral stem. Wrap the base with green floral tape, stretching the tape slightly as you spiral downward. If your peony is heavy, use a stronger stem wire rather than relying on a single soft pipe cleaner.
Step 8: Make Peony Leaves
Shape green chenille stems into elongated pointed leaves. Make several leaflets and attach them in small groups along the stem. Keep the leaves below the flower head so the layered bloom remains the main focus.
Step 9: Shape the Finished Peony
Once everything is assembled, spend a few minutes shaping the flower. Lift some inner petals, open selected middle petals, and curve the outer petals. This final shaping step often makes a bigger visual difference than adding more material.
How to Make a Pipe Cleaner Peony Look Realistic
- Use at least three different petal sizes.
- Stagger petals instead of stacking them in straight rows.
- Keep the center tighter than the outside.
- Let the outer petals open at different angles.
- Use two related shades of the same color for subtle depth.
- Hide twists and connections underneath the bloom.
- Shape the flower again after assembly.
Best Colors for Handmade Peonies
Blush Pink Peony
Combine pale pink inner petals with slightly deeper blush outer petals for a soft bouquet flower.
White and Cream Peony
Mix white and warm cream chenille stems with a pale yellow center for an elegant neutral arrangement.
Deep Red Peony
Deep red creates a dramatic bloom that works particularly well as a single statement flower or in a romantic handmade bouquet.
How to Use Pipe Cleaner Peonies in a Bouquet
Because peonies are visually large, you do not need many of them to create a full arrangement. Start with three peonies at slightly different heights, then add smaller flowers, buds, leaves, and light filler stems around them.
If you are building your first mixed arrangement, follow our realistic pipe cleaner flower bouquet tutorial for the complete process of arranging, balancing, securing, and wrapping the stems.
Common Pipe Cleaner Peony Mistakes
If the finished flower looks more like a daisy, the petals are probably too flat and evenly spaced. Bring the inner layers closer together and add more overlap. If it resembles a tight rose, loosen the middle and outer layers rather than spiraling every petal toward the center.
A drooping flower head usually means the stem is too flexible for the weight of the bloom. Reinforce it with floral wire and wrap the connection firmly with floral tape.
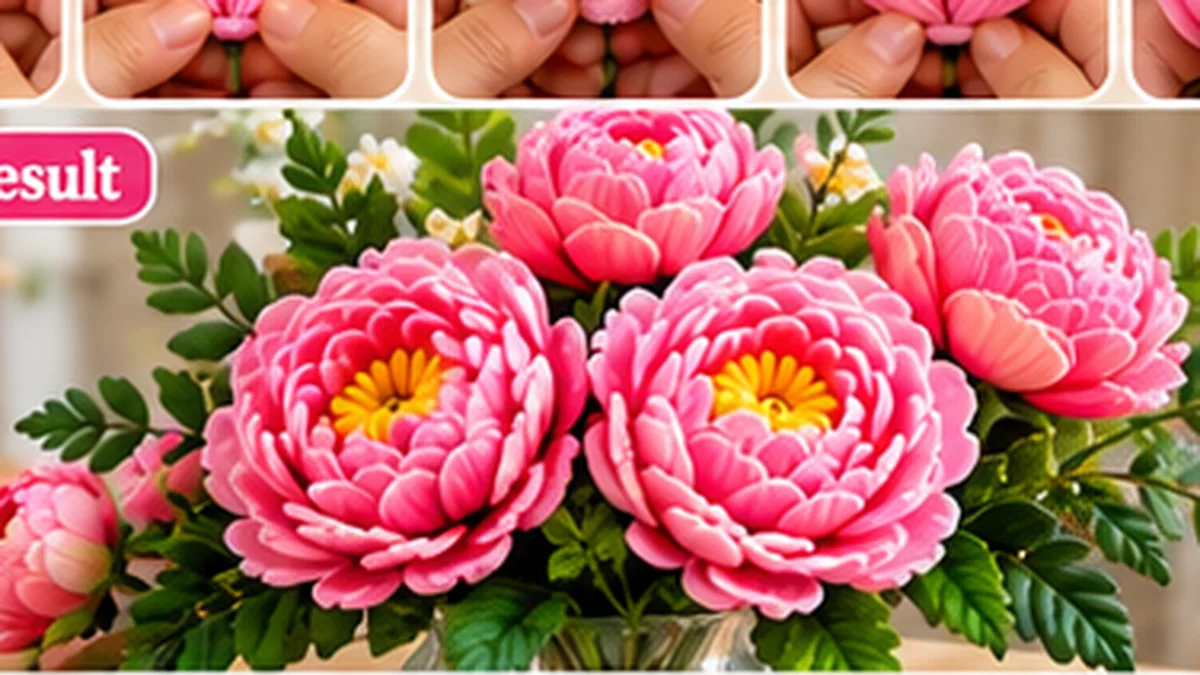
Pipe Cleaner Peony Bouquet Ideas
Try a monochrome bouquet with several shades of pink, a bridal-inspired arrangement with white and cream peonies, or a spring bouquet combining peonies with smaller pastel flowers. For gift wrapping, neutral kraft paper or soft tissue paper keeps attention on the textured blooms.
How Many Layers Should a Pipe Cleaner Peony Have?
There is no fixed number, but the flower looks more convincing when the petal size changes gradually. A practical structure is a compact center followed by small inner petals, medium petals and a final ring of larger outer petals. The goal is not to count identical pieces. It is to build a rounded bloom with no obvious empty ring between layers.
Check the peony from above and from the side after each layer. If the center looks exposed, add a small petal rather than immediately making the next ring larger. If the flower becomes too dense, gently open selected petals before adding more material.
How to Shape Peony Petals After Assembly
Final shaping is essential for a realistic pipe cleaner peony. Keep the innermost petals upright and close to the center. Angle the middle petals outward, then curve the largest petals more loosely. Work around the flower rather than shaping one side completely before the other.
Use your fingertips to round the upper edge of each chenille loop. Avoid sharp folds unless you deliberately want a more stylized flower. Slight differences between petals help the finished bloom look softer and more natural.
How to Make a Peony Bud
A bud is useful when you want a bouquet with several stages of bloom. Start with a compact oval of petal-colored chenille and keep the outer pieces wrapped closely around it. Add small green sepals underneath and attach the bud to a reinforced stem. Bend the upper stem slightly so the bud does not stand as rigidly as a fully open flower.
Pair one or two buds with open peonies to create height and visual variety. For the complete arrangement process, use the realistic pipe cleaner flower bouquet tutorial.
Peony Stem and Leaf Placement
Because the flower head is large, avoid placing bulky leaves directly beneath it. Position the first leaf group lower on the stem so the bloom remains visible. If the stem bends, reinforce it with floral wire before adding the leaves and floral tape.
For a mixed bouquet, combine the peony with tighter pipe cleaner ranunculus flowers or open pipe cleaner anemones. The different silhouettes make the peony look fuller without requiring every flower to be oversized.
How to Store and Reshape Pipe Cleaner Peonies
Store finished flowers upright or in a shallow box with enough room around each bloom. If the petals become compressed, begin at the outer layer and gently restore each curve before adjusting the center. Keep the flowers dry and avoid high heat, which can affect glue or other optional decorative materials.
Pipe Cleaner Peony Troubleshooting
If the center looks hollow, add one or two small petals before changing to the medium size. If the bloom becomes too wide, lift the middle layers instead of adding more petals. A peony that looks like a rose usually has petals arranged in too strong a spiral. Reposition them in staggered rings and soften the outer layer.
If the flower head rotates on the stem, strengthen the connection underneath the bloom and cover it with sepals. For a heavy flower, floral wire provides more reliable support than adding several soft pipe cleaners around the same stem.
Making a Set of Matching Peonies
When making several flowers, keep the construction method consistent but vary the final opening. Make one peony fully open, another slightly tighter and a third smaller bloom or bud. Use related colors and repeat the same green foliage so the flowers clearly belong to one arrangement without looking mechanically identical.
How Much Chenille Stem Do You Need for One Peony?
A full pipe cleaner peony uses more chenille than a simple open flower because several overlapping layers create the rounded bloom. Prepare the petal pieces before assembly so you can compare sizes and avoid running out of the main color halfway through a layer. Keep extra green chenille available for sepals and leaves, and use a firm floral stem when the finished head becomes heavy.
If you are making several peonies for one bouquet, complete one flower first and use it as a size reference. The remaining blooms can be slightly smaller or more closed. This approach creates a coordinated set while preventing unnecessary material waste.
Choosing Pipe Cleaners for Soft Peony Petals
Chenille stems with an even, dense surface are easier to shape into rounded petals because the wire core stays visually covered. Before starting the flower, bend one test loop and check whether it holds a smooth curve. Very stiff stems can make the petals angular, while extremely soft stems may need more support at the flower base.
Two close shades of the same color can add depth. Use the darker tone sparingly near the center or between selected layers, then let the lighter shade dominate the outer petals. The color change should look irregular rather than forming a strict ring.
How to Adjust the Size of a Pipe Cleaner Peony
To make a smaller flower, reduce both the petal size and the number of layers rather than simply squeezing a large pattern together. For a larger statement bloom, increase the outer petals gradually and reinforce the stem early. Keeping the center proportionally compact helps both sizes remain recognizable as peonies.
Where to Display Handmade Peonies
Single stems work well in narrow bud vases, while groups of three or five create fuller desk and shelf arrangements. Peonies can also be used in lasting gift bouquets, spring decor and handmade centerpieces. Keep enough space around the bloom so the layered petals remain visible instead of being compressed by neighboring flowers.
FAQS
Are pipe cleaner peonies beginner friendly?
The petal technique is beginner friendly, but a full peony takes more time than a simple flower because it uses several layered rings of petals.
How many petals should a pipe cleaner peony have?
There is no single required number. Focus on creating enough overlapping petals to hide large gaps while keeping the outer silhouette soft and irregular.
Can I make a pipe cleaner peony without hot glue?
Many components can be secured by twisting chenille stems and wrapping the base. Glue is useful for reinforcing a heavy layered bloom, but the exact construction method can be adapted.
Why does my peony look too flat?
The most common causes are identical petal sizes and insufficient curvature. Make the center compact, increase petal size gradually, and bend the middle and outer layers in different directions.
Can I use pipe cleaner peonies for wedding decor?
Yes. Handmade peonies can be incorporated into decorative bouquets, table arrangements, bridal shower decor, and keepsake floral displays.
Final Tips
A convincing pipe cleaner peony depends on layers more than perfect symmetry. Build from a tight center toward progressively larger petals, stagger each ring, and shape the finished bloom from several angles. Once you master one flower, make two or three more in related shades and combine them into a lasting handmade bouquet.
6 thoughts on “How to Make a Pipe Cleaner Peony: Easy Step-by-Step Tutorial”