

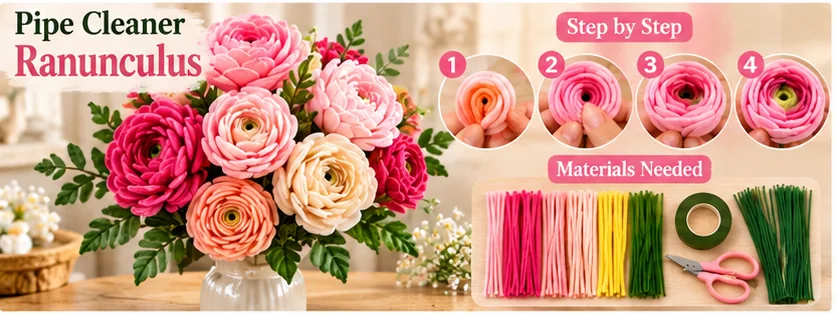
A pipe cleaner ranunculus is a great handmade flower to learn when you want a dense, romantic bloom with many rounded layers. Unlike a simple five-petal flower, a ranunculus gets its characteristic look from tightly packed inner petals that gradually open toward the outside.
This beginner-friendly tutorial shows you how to build the flower in layers, attach it to a sturdy stem, add leaves, and shape the finished bloom for bouquets, gifts, and floral decor.
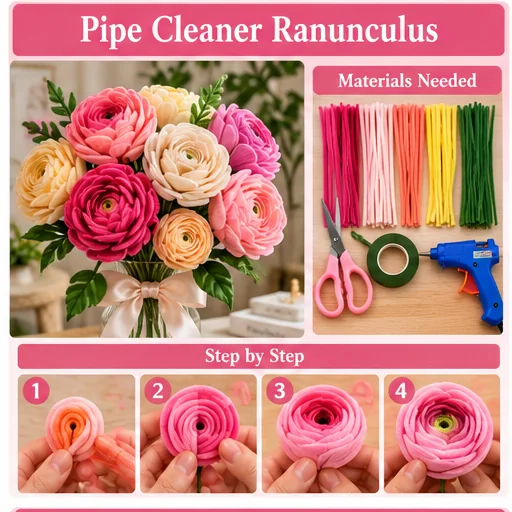
Materials for a Pipe Cleaner Ranunculus
- Pipe cleaners in your chosen flower color
- Green pipe cleaners
- Floral stem wire or a sturdy craft stem
- Green floral tape
- Scissors or wire cutters
- Ruler
- Hot glue, optional for reinforcement
Choose one main color or combine two close shades. Peach with pale coral, blush with cream, or yellow with soft orange can create subtle depth without making the flower look overly busy.
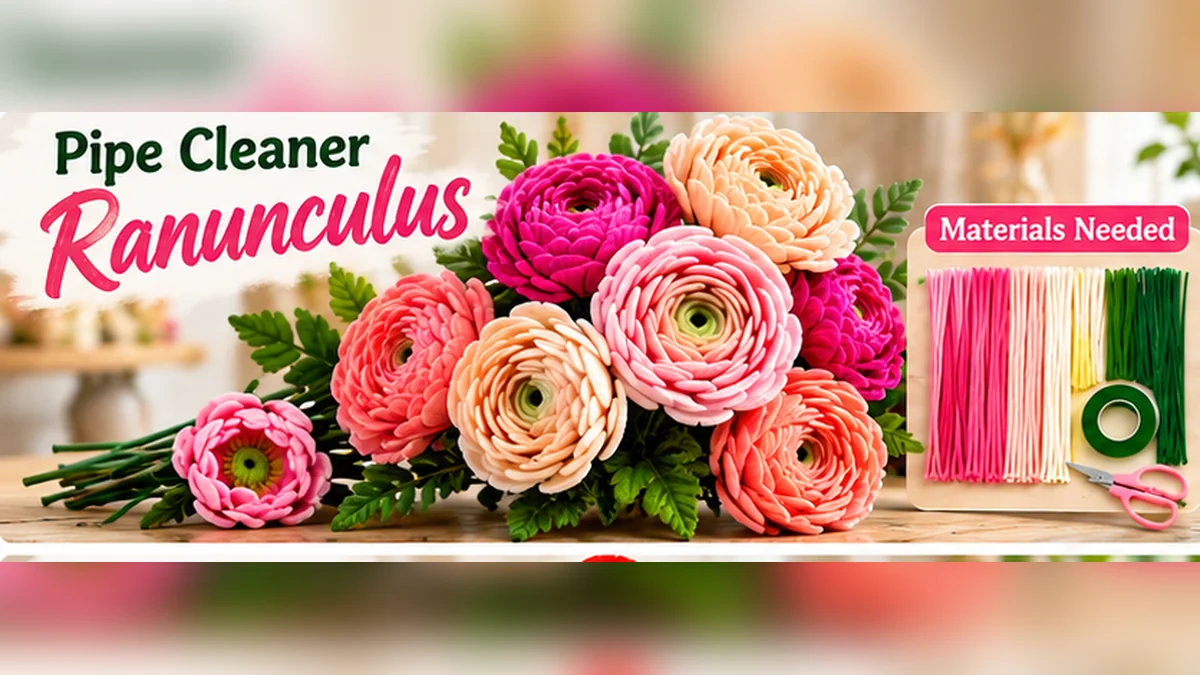
What Makes a Ranunculus Shape Different?
The ranunculus silhouette is compact and rounded. The center petals stay close together, while each surrounding layer opens a little farther. The flower should look densely layered rather than flat or star-shaped.
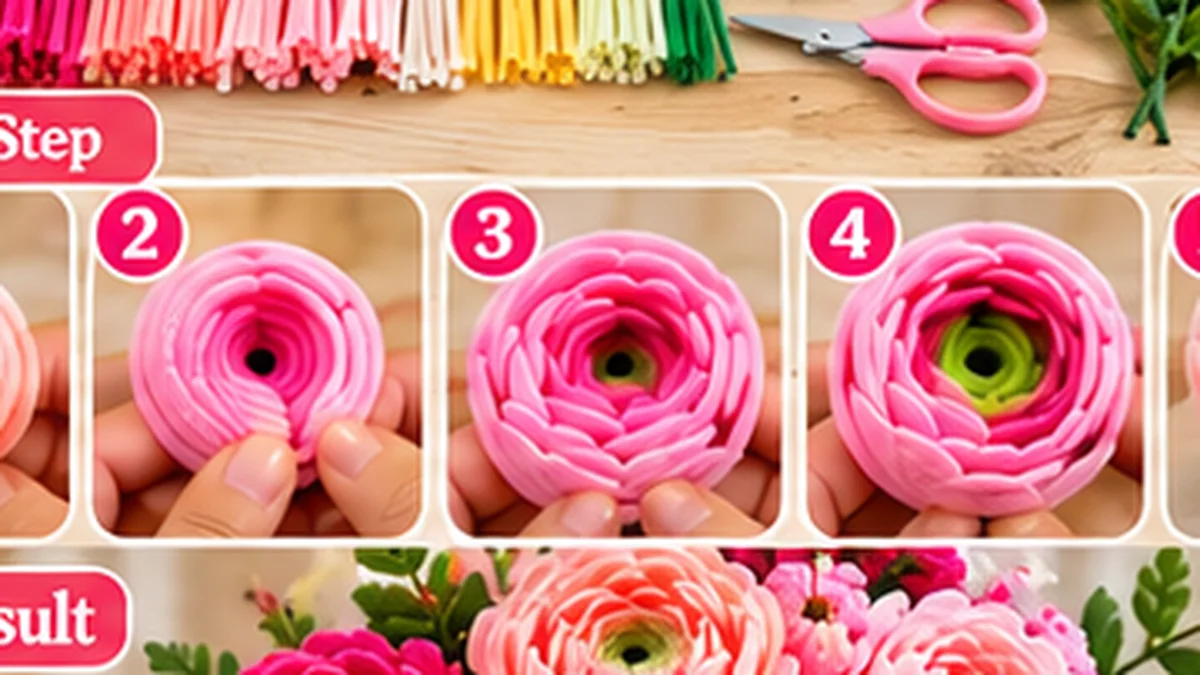
Step 1: Create the Tight Flower Center
Start with a short piece of chenille stem and coil it into a small rounded center. Keep it compact. This will act as the anchor around which the first petal layer is arranged.
Step 2: Make the Small Inner Petals
Form several small rounded loops from your petal-colored pipe cleaners. Pinch each loop near the base and curve the top inward. Arrange these petals tightly around the center so they overlap and partially hide the core.
Step 3: Add a Second Ring of Petals
Make another group of petals slightly larger than the first. Place them between the gaps of the inner petals. Keep this layer fairly upright, but allow the top edges to open a little more than the center.
Step 4: Build the Middle Layers
Continue creating rounded petal loops, increasing their size gradually. Add them around the flower in staggered rings. Rotate the bloom as you work so one side does not become thicker than the other.
The middle layers should create volume without opening completely. If the flower starts to look flat, bend the bases inward and lift the petals around the center.
Step 5: Shape the Outer Petals
Make the final petals wider and allow them to curve outward. Position them lower around the bloom so they support the rounded silhouette. Do not make every outer petal identical. Small differences in angle make the finished flower look more natural.
Step 6: Secure the Flower Base
Gather the petal connections underneath the bloom and secure them firmly. Add a sturdy floral stem through or against the base, then wrap the connection with green floral tape. A dense flower head needs enough support to stay upright.
Step 7: Add Green Sepals
Make several small pointed green loops and arrange them directly beneath the petals. These sepals conceal the construction and create a cleaner transition between the flower and stem.
Step 8: Make Simple Leaves
Use green chenille stems to create narrow or slightly lobed leaf shapes. Attach the leaves lower on the stem rather than directly underneath the flower head. Bend them gently away from the stem for a more dimensional finish.
Step 9: Shape the Finished Ranunculus
Look at the flower from above and from the side. Tighten any overly open inner petals and loosen selected outer petals. The center should remain dense while the outside gradually relaxes.
How to Make a Pipe Cleaner Ranunculus Look Realistic
- Increase petal size gradually from center to edge.
- Overlap each ring instead of leaving visible gaps.
- Keep inner petals upright and compact.
- Open the outer petals progressively.
- Use two close shades for subtle color variation.
- Hide bulky twists beneath the flower.
- Reshape every layer after assembly.
Pipe Cleaner Ranunculus Color Ideas
Peach Ranunculus
Combine peach inner petals with pale coral or cream outer petals for a warm spring arrangement.
Pink Ranunculus
Use blush and soft pink for a romantic bloom that works well in gift bouquets and pastel decor.
Yellow Ranunculus
Yellow creates a bright focal flower. A touch of pale orange in the center can add dimension while keeping the palette cohesive.
White Ranunculus
White and cream create a neutral handmade flower suitable for wedding-inspired arrangements and minimalist decor.
Ranunculus vs Pipe Cleaner Peony
Both flowers use layered petals, but their finished shapes should be different. A ranunculus is more compact and orderly, with many rounded layers that open gradually. A peony is fluffier and more irregular, with broader outer petals. If you want to compare the techniques, see our pipe cleaner peony tutorial.
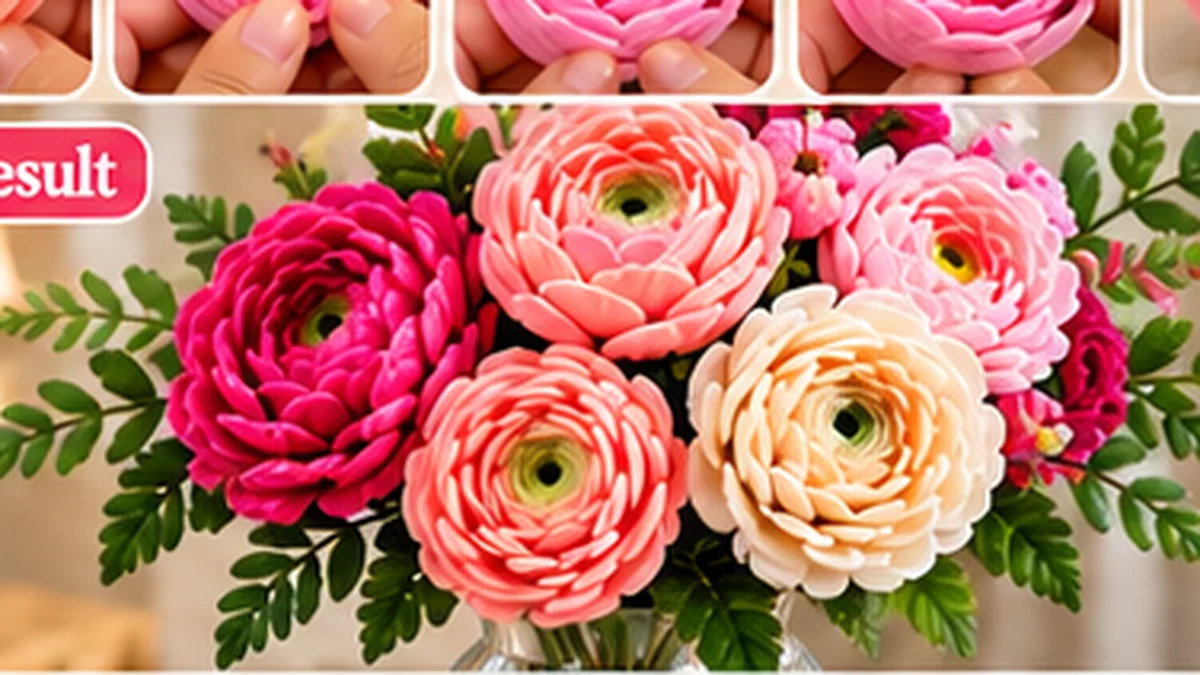
Using Ranunculus Flowers in a Bouquet
Ranunculus blooms work well as medium-sized focal flowers. Combine several in related shades, then add smaller blossoms, greenery, and a larger statement flower. For arranging and wrapping the full project, follow our realistic pipe cleaner flower bouquet tutorial.
For a contrasting rounded cluster, you can also add a pipe cleaner hydrangea to a mixed arrangement.
Common Mistakes to Avoid
If the flower looks like a flat daisy, the petals are too open and too evenly spaced. Bring the inner layers closer to the center and overlap them more. If it looks like a spiral rose, reduce the spiral effect and arrange the petals in overlapping rings instead.
Another common issue is making the outer petals too large too quickly. Increase the size gradually so the flower keeps its compact rounded form.
How Many Petal Rings Does a Pipe Cleaner Ranunculus Need?
A ranunculus is recognized by compact concentric layers, so gradual progression matters more than an exact petal count. Begin with a tight center and add small overlapping petals around it. Increase the petal size only a little with each new ring. The outer layers can open farther, but they should still support the rounded overall shape.
Look down at the flower after every ring. Large visible gaps mean the petals need more overlap. If the bloom starts to resemble a flat daisy, bring the middle layers closer to the center before continuing.
How to Keep the Ranunculus Round
Rotate the flower as you add petals and avoid completing one side before the other. Keep the inner petals upright, angle the middle petals slightly outward and allow the last ring to relax more. This change in angle creates depth without making the bloom excessively large.
After assembly, cup the flower gently in your hands and adjust individual petals. Do not squeeze the bloom tightly because that can flatten the chenille texture and hide the layered construction.
Ranunculus Buds for a More Realistic Arrangement
To make a bud, form a small compact ball or oval from the flower color, then wrap the lower portion with green sepals. Attach it to a narrow reinforced stem. Make buds smaller and more closed than the main flowers so they clearly represent a different growth stage.
A few buds can make a group of ranunculus flowers look more natural and help fill narrow spaces in a realistic pipe cleaner flower bouquet.
Best Flowers to Pair With Ranunculus
The compact ranunculus shape contrasts well with a softer pipe cleaner peony. For stronger contrast, add an open flower with a visible center such as a pipe cleaner anemone or pipe cleaner poppy. Use greenery between dense blooms so their outlines remain visible.
How to Reinforce the Stem
Layered ranunculus heads can become heavy. Attach the flower base to floral wire or a firm craft stem and wrap the connection with floral tape. If the flower still leans, reinforce the stem before adding leaves rather than adding more tape around an already weak connection.
Storage and Final Reshaping
Store finished ranunculus flowers with space around the heads. If a bloom becomes compressed, restore the outer petals first and then work toward the center. Keep the flower dry and avoid crushing it beneath wrapping paper or other craft supplies.
Pipe Cleaner Ranunculus Troubleshooting
If the center looks too open, add a few small petals before continuing outward. If the bloom becomes flat, lift the middle rings and keep only the largest outer petals relaxed. If the flower resembles a rose, reduce the spiral arrangement and stagger the petals more evenly around the center.
A loose flower base can cause the entire bloom to rotate. Secure the petal connections before adding sepals, then reinforce the stem if necessary. Make structural corrections before final shaping so you do not repeatedly crush the outer petals.
Making a Coordinated Ranunculus Set
Create several flowers using the same layered method but vary their size and degree of opening. A small tight bloom, a medium flower and a fuller open ranunculus look more natural together than three identical copies. Repeat one or two colors throughout the set to keep the arrangement visually connected.
How Much Chenille Do You Need for One Ranunculus?
A layered ranunculus uses a series of small and medium petals rather than a few large pieces. Prepare enough of the main color to complete the flower without changing shade unexpectedly. Keep green chenille for sepals and leaves, plus floral wire or another firm stem if you are making a dense bloom.
For multiple flowers, make one complete ranunculus before cutting all the pieces for the rest. You can then decide whether the next blooms should be smaller, tighter or more open and adjust the material accordingly.
Choosing the Best Petal Proportions
The smallest petals belong close to the center. Each new ring should become only slightly larger than the previous one. A sudden jump in size creates an obvious gap between the compact center and the outer flower. When in doubt, add an intermediate petal size instead of making the outer layer dramatically larger.
How to Make a Smaller Ranunculus
Use fewer layers and shorten the petal loops while preserving the concentric structure. A miniature version should still have a tight center and gradually opening outer petals. These smaller flowers are useful for filling spaces between larger peonies, hydrangeas and open-faced blooms.
Color Blending for a More Detailed Flower
Use two related shades if you want subtle variation. A slightly deeper color near the center can make the layered construction easier to see, while a lighter outer shade softens the bloom. Avoid changing color at every ring because too many sharp transitions can distract from the characteristic ranunculus shape.
Best Uses for Pipe Cleaner Ranunculus Flowers
Ranunculus flowers work well in hand-tied bouquets, small vase arrangements, lasting gifts and spring-inspired decor. Their compact shape makes them especially useful between larger flowers. When arranging several stems, turn some blooms slightly to the side so the bouquet does not become a row of identical front-facing circles.
Quick Ranunculus Finishing Check
Before placing the flower in a bouquet, rotate it slowly and look for gaps, loose petals or a leaning stem. Adjust the outer rings without flattening the compact center. Check that green sepals hide the attachment underneath and that the leaves do not cover the bloom. A few minutes of final shaping can make the layered structure much clearer.
FAQS
Is a pipe cleaner ranunculus easy for beginners?
Yes, once you learn the repeated loop-petal technique. The main challenge is keeping the layers evenly distributed around the flower.
How is a ranunculus different from a peony?
A handmade ranunculus should have tighter, more orderly concentric layers, while a peony is generally shaped to look softer, larger, and more irregular.
Can I make a pipe cleaner ranunculus without glue?
Many parts can be secured by twisting and wrapping the chenille stems. Glue is optional reinforcement depending on the construction method and flower size.
Why is my flower head drooping?
A dense layered bloom may be too heavy for a soft chenille stem. Reinforce the flower with floral wire or another sturdy craft stem.
Final Tips
The key to a convincing pipe cleaner ranunculus is gradual progression. Start with a compact center, increase petal size a little at a time, and let only the outer layers open widely. Once the first bloom is complete, repeat the same technique in several coordinated colors to create a fuller handmade arrangement.
5 thoughts on “How to Make a Pipe Cleaner Ranunculus: Easy Flower Tutorial”