

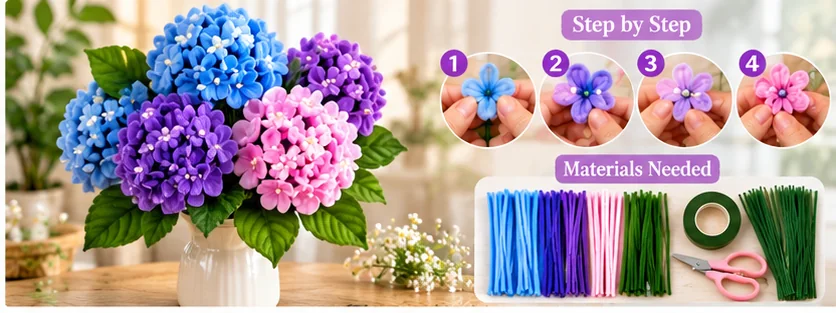
A pipe cleaner hydrangea is made by combining many small chenille stem blossoms into one rounded flower head. The finished bloom looks detailed and full, making it especially useful for handmade bouquets, room decor, gifts, and floral displays.
This tutorial breaks the project into repeatable steps so beginners can make the individual florets first, then assemble them into a balanced hydrangea cluster.
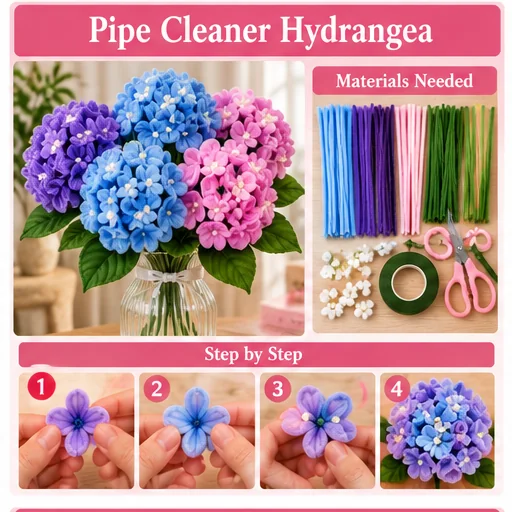
Materials for a Pipe Cleaner Hydrangea
- Pipe cleaners in one or two flower colors
- Green pipe cleaners for leaves and supports
- Floral stem wire or sturdy flower stems
- Green floral tape
- Small beads or artificial stamens, optional
- Scissors or wire cutters
- Hot glue, optional for reinforcement
Hydrangeas contain many small flowers, so prepare more chenille stems than you would for a single rose or tulip. Using two closely related shades, such as lavender and pale purple, can give the finished cluster more depth.
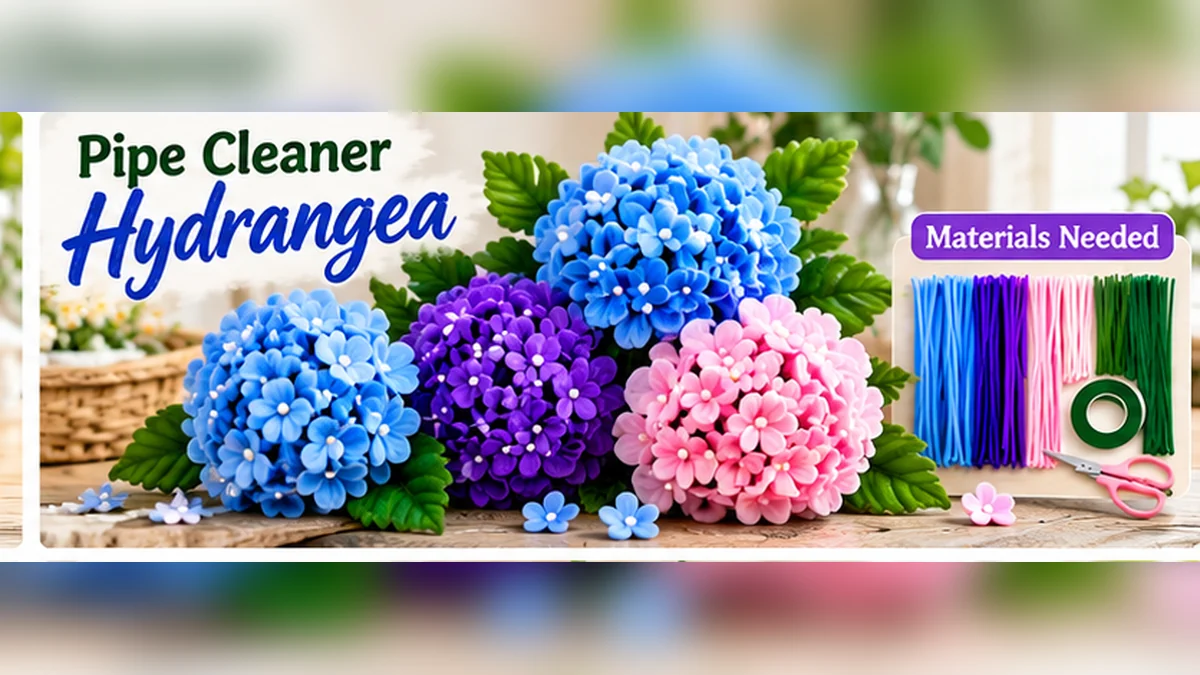
How a Pipe Cleaner Hydrangea Is Built
Instead of making one large flower, you will create a collection of small four-petal florets. These are attached to short supports and grouped around a central stem. The cluster should gradually become rounded rather than forming a flat disk.
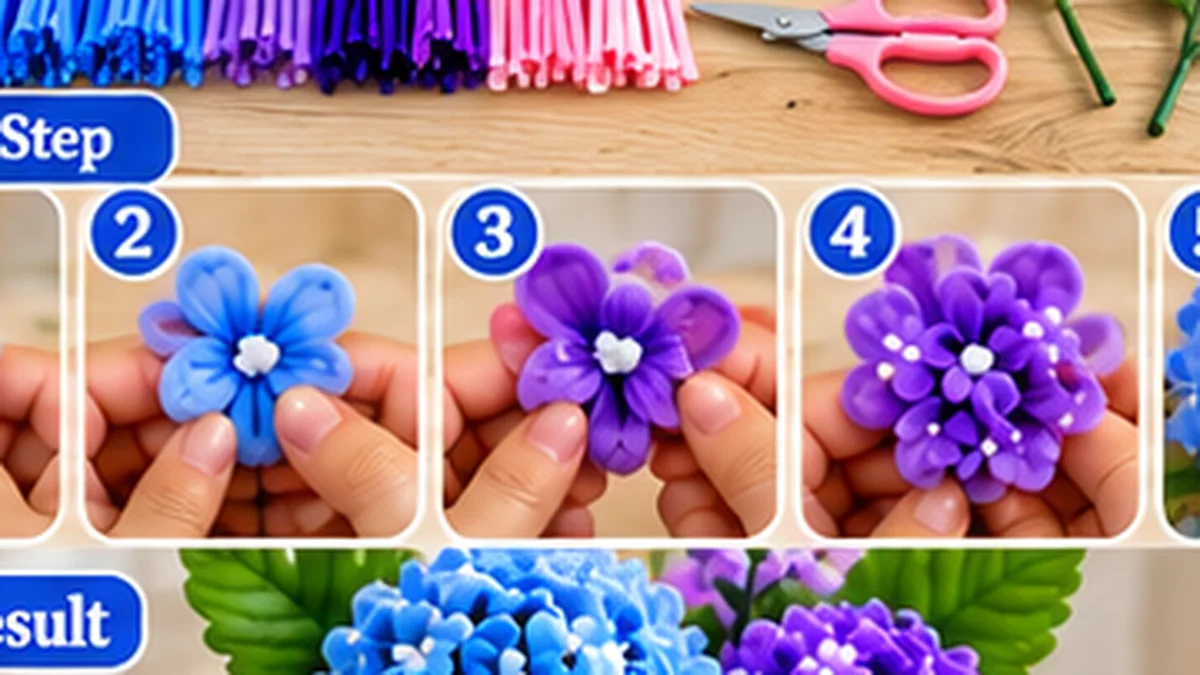
Step 1: Make a Small Hydrangea Floret
Take a section of colored pipe cleaner and form four small loops. Keep the loops similar in size, twist the base to hold them together, then spread the four petals around the center. Gently flatten and round each loop with your fingers.
Step 2: Add the Flower Center
Add a tiny contrasting center if desired. A small bead, artificial stamen, or tightly coiled chenille piece can work. Keep the center subtle because the mass of small blossoms is the main feature of a hydrangea.
Step 3: Repeat the Small Flowers
Make enough florets to form a full cluster. Vary a few slightly in size rather than making every blossom mechanically identical. This repetitive stage takes the most time, but it determines how dense the finished hydrangea will look.
Step 4: Attach Short Supports
Attach each floret to a short green chenille or floral-wire support. Secure the connection underneath the blossom. These individual supports allow you to position each flower when building the rounded head.
Step 5: Build the Center Cluster
Begin with several florets close together at the top of the main stem. Position one slightly higher and arrange the others around it. Secure the small stems together with floral tape.
Step 6: Expand the Hydrangea Head
Add more florets around the center group. Angle their short stems outward slightly so the cluster grows in width as well as height. Rotate the flower frequently while assembling it to identify empty spaces.
Step 7: Shape a Rounded Flower Head
Continue adding florets around the sides and lower edge. Avoid placing all flower faces on one plane. Some should point upward, some forward, and others slightly sideways. This creates the characteristic rounded hydrangea silhouette.
Step 8: Secure the Main Stem
Once the cluster feels balanced, wrap the gathered supports firmly to the main floral stem with green floral tape. Work downward until the transition is neat and stable. A large hydrangea head can become heavy, so a sturdy stem is preferable to one soft pipe cleaner.
Step 9: Make Broad Hydrangea Leaves
Shape green pipe cleaners into broad pointed leaves. Hydrangea leaves should look wider than the narrow leaves used on many other handmade flowers. Attach one or more leaves below the flower head and shape them outward.
Step 10: Final Shaping
Inspect the hydrangea from the front, sides, and top. Lift any buried florets and gently bend individual supports to fill visible gaps. Do not compress the entire cluster into a perfect ball. A slightly irregular outline looks more natural.
How to Make Pipe Cleaner Hydrangeas Look Realistic
- Combine two close shades of the same flower color.
- Keep individual florets small.
- Point flowers in several directions.
- Build a rounded cluster instead of a flat circle.
- Use a sturdy central stem.
- Add broad green leaves below the bloom.
- Leave small natural gaps instead of packing every floret tightly.
Best Pipe Cleaner Hydrangea Colors
Purple Hydrangea
Mix lavender with a slightly deeper purple for a classic handmade hydrangea with visible color variation.
Pink Hydrangea
Soft pink and blush work well for romantic bouquets, gifts, and pastel room decor.
Blue Hydrangea
Combine pale blue with a few lavender florets to create more visual depth than a single flat blue shade.
White Hydrangea
White and cream florets create a neutral bloom that pairs easily with colorful flowers in a mixed bouquet.
Using Hydrangeas in a Pipe Cleaner Bouquet
A hydrangea is visually substantial, so one or two clusters can fill a large part of an arrangement. Pair them with smaller focal flowers, buds, and greenery rather than adding too many other oversized blooms.
For a complete arrangement method, see our realistic pipe cleaner flower bouquet tutorial. If you want another large statement bloom, our pipe cleaner peony tutorial shows a completely different layered-petal technique.
Common Mistakes
If your hydrangea looks flat, the individual florets are probably facing the same direction. Bend their supports so the flower head has depth. If the cluster looks sparse, add florets strategically around visible gaps instead of squeezing the existing flowers together.
If the bloom droops, reinforce the central stem. A dense hydrangea uses many small components and can be heavier than it appears.
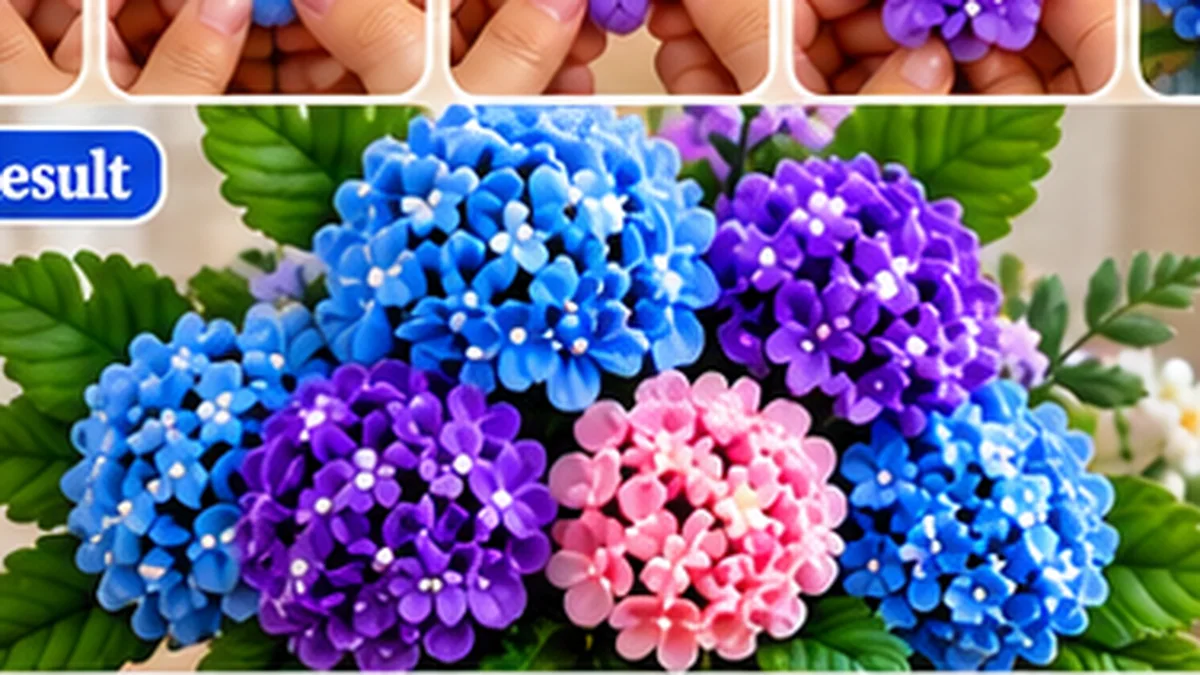
Pipe Cleaner Hydrangea Bouquet Ideas
Try a pastel arrangement with pink and lavender hydrangeas, a blue-and-white bouquet for cool-toned decor, or a neutral cream hydrangea surrounded by green leaves. Mini hydrangea clusters can also be used as filler beside larger handmade flowers.
How to Build a Full Pipe Cleaner Hydrangea Head
The most convincing hydrangea is made from many small florets rather than a few oversized petals. Build several individual flower units first, then group them into a rounded cluster. Work from the center outward and rotate the flower head frequently so one side does not become denser than the other.
Do not force every floret to face directly forward. Angle some slightly upward and others toward the sides. This creates the rounded surface associated with a hydrangea and prevents the finished flower from looking like a flat disk.
How Many Florets Do You Need?
The exact number depends on the size of each small flower and the diameter you want. Instead of following a rigid count, make an initial batch and assemble them loosely. Add more florets wherever the underlying structure remains visible. Smaller florets generally create a more detailed result, while larger units produce a quicker, more stylized hydrangea.
How to Mix Hydrangea Colors Naturally
Using two or three related colors can create more depth than one solid shade. For a blue hydrangea, mix soft blue with a small amount of lavender or pale green. For a pink version, combine blush, dusty pink and a few cream accents. Distribute the colors irregularly rather than creating obvious stripes.
If you are using the hydrangea in a mixed bouquet, repeat one of its colors elsewhere in the arrangement. It pairs especially well with a layered pipe cleaner peony or an open pipe cleaner anemone.
How to Support a Heavy Hydrangea Cluster
A finished cluster can be heavier than a single pipe cleaner stem can support. Gather the floret stems around floral wire or another firm craft stem, then wrap the connection with floral tape. Keep the attachment compact so the underside of the flower does not become bulky.
Add several broad leaves below the flower head to hide the construction and create a natural transition to the stem. For a vase arrangement, make the reinforced stem long enough to sit securely among the other flowers.
Using Hydrangeas in a Handmade Bouquet
Hydrangeas are useful as volume flowers because one rounded head fills more visual space than a small individual bloom. Place one cluster slightly off center, then surround it with flowers of different shapes. Compact pipe cleaner ranunculus flowers add detail, while the bouquet tutorial explains how to balance and wrap the complete arrangement.
Storage and Reshaping Tips
Store the flower where the cluster is not pressed against a hard surface. If several florets flatten, reshape them individually from the outside of the cluster toward the center. Keep the finished craft dry and remove dust gently so the small flower units stay defined.
Pipe Cleaner Hydrangea Troubleshooting
If the flower head looks flat, shorten some supports near the center and angle outer florets toward the sides. If the cluster looks patchy, add small florets only where the underlying structure is visible instead of covering the entire surface with another layer. A cluster that droops needs stronger central support rather than more floral tape around the outside.
Making Several Hydrangeas for One Arrangement
For a coordinated set, vary the diameter slightly and change the color distribution from one cluster to another. One flower can contain more blue, another more lavender, while both repeat the same pale accent. This creates variation while keeping the bouquet cohesive.
Hydrangea Leaf Placement
Broad leaves work best below the rounded flower head. Attach them at different heights and angles instead of creating a symmetrical pair. In a mixed bouquet, allow some leaves to sit between neighboring blooms so the individual flower shapes remain easy to distinguish.
How Much Chenille Do You Need for a Hydrangea?
A hydrangea usually requires more individual pieces than a single large-petal flower because the head is assembled from many small florets. Make a test floret first, then prepare a batch of similarly sized pieces. This makes assembly faster and helps the final cluster stay consistent without requiring every small flower to be identical.
Keep additional green pipe cleaners for the broad leaves and enough floral tape to secure the central bundle. If you plan a large cluster, prepare a strong stem from the beginning rather than trying to reinforce a finished heavy flower.
Choosing the Right Floret Size
Small florets create a detailed, dense surface, while larger florets make the project quicker and more graphic. Whichever size you choose, keep most florets within a similar range and use a few smaller ones to fill gaps. Oversized units can make the flower head look like a collection of separate blossoms instead of one rounded hydrangea.
How to Make a Smaller Hydrangea
For a compact flower, reduce the number of florets and the diameter of the cluster while keeping the rounded construction. Do not simply flatten a full-size head. A smaller hydrangea works well in mixed bouquets because it provides texture without dominating neighboring flowers.
Best Uses for Handmade Hydrangeas
One large hydrangea can serve as a volume flower in a vase or gift bouquet. Smaller clusters can be grouped for table decor, shelf arrangements or seasonal crafts. Because the flower head already contains many visual details, keep surrounding filler relatively simple so the individual florets remain visible.
How to Keep the Cluster Neat While Working
As the head grows, temporarily gather the supports near the base with a loose wrap of floral tape. This keeps finished florets from shifting while you add new ones. Remove or cover temporary wraps during final assembly so the underside remains tidy. Check the silhouette frequently rather than waiting until every floret is attached.
FAQS
Is a pipe cleaner hydrangea beginner friendly?
Yes. The individual floret is simple, but the project requires patience because many small flowers must be made and assembled.
Why does my hydrangea look flat?
Usually the florets are positioned on the same plane. Angle the short supports upward, forward, and sideways to create a rounded cluster.
Can I make a hydrangea with only one color?
Yes. One color works well, although mixing two close shades can emphasize the many individual florets.
Do I need floral wire?
A sturdy support is recommended for a full flower head. Depending on the materials available, floral wire or another firm craft stem can provide more support than a single soft chenille stem.
Final Tips
The easiest way to make a convincing pipe cleaner hydrangea is to focus on repetition and arrangement. Make the small florets consistently, then spend time positioning them into a rounded cluster. Once you master the basic construction, experiment with different colors and cluster sizes for bouquets and handmade floral decor.
2 thoughts on “How to Make a Pipe Cleaner Hydrangea: Easy Flower Tutorial”