

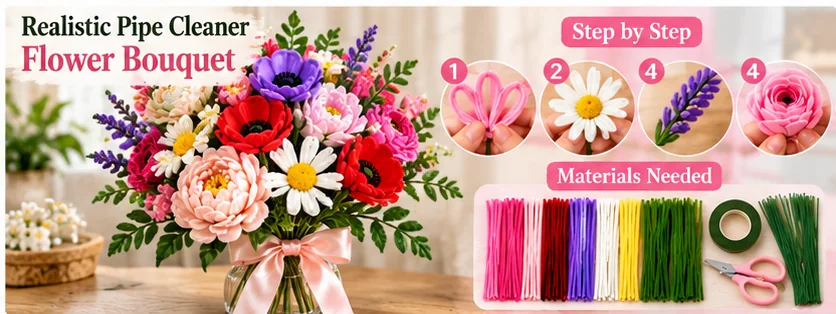
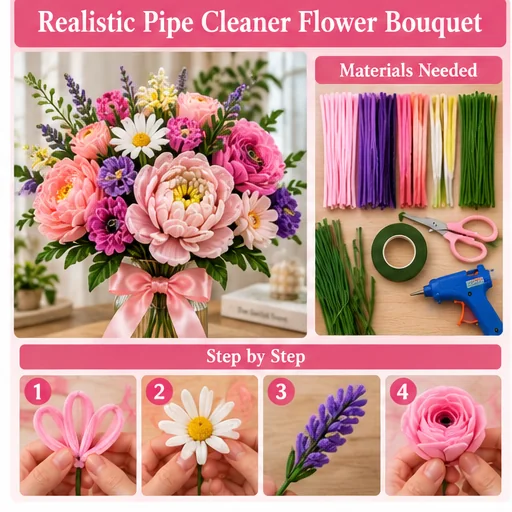
Learning how to make a realistic pipe cleaner flower bouquet is an easy way to turn simple craft supplies into a colorful handmade arrangement. With chenille stems, scissors, floral tape, and a little shaping, you can create flowers that look polished enough for gifts, desk decor, party decorations, or a bouquet that lasts far longer than fresh flowers.
This beginner-friendly tutorial shows you how to build a balanced bouquet step by step, including simple flowers, leaves, stems, filler pieces, and wrapping. You do not need advanced craft skills or expensive tools.
Materials You Need for a Pipe Cleaner Flower Bouquet
- Chenille stems or pipe cleaners in flower colors
- Green pipe cleaners for stems and leaves
- Scissors
- Floral tape
- Craft glue or a low-temperature glue gun, optional
- Floral wire, optional for extra support
- Ribbon, kraft paper, tissue paper, or bouquet wrapping paper
- Small beads or pom-poms, optional for flower centers
For a realistic result, choose two or three shades for the flowers rather than using every color at once. Green stems in slightly different tones can also make the bouquet look more natural.
How Many Pipe Cleaners Do You Need?
A small bouquet usually needs about 20 to 35 pipe cleaners, depending on the flower designs and the number of leaves. A fuller bouquet may require 40 to 60 or more. Keep several green stems aside because leaves, flower stems, and filler branches use more green than beginners often expect.
Step 1: Choose a Simple Color Palette
Start with one main flower color, one supporting color, and one light accent. For example, pink, cream, and soft yellow create a gentle spring bouquet. Purple, white, and green create a cooler arrangement. A limited palette makes individual handmade flowers feel like one intentional bouquet.
Step 2: Make the First Five-Petal Flower
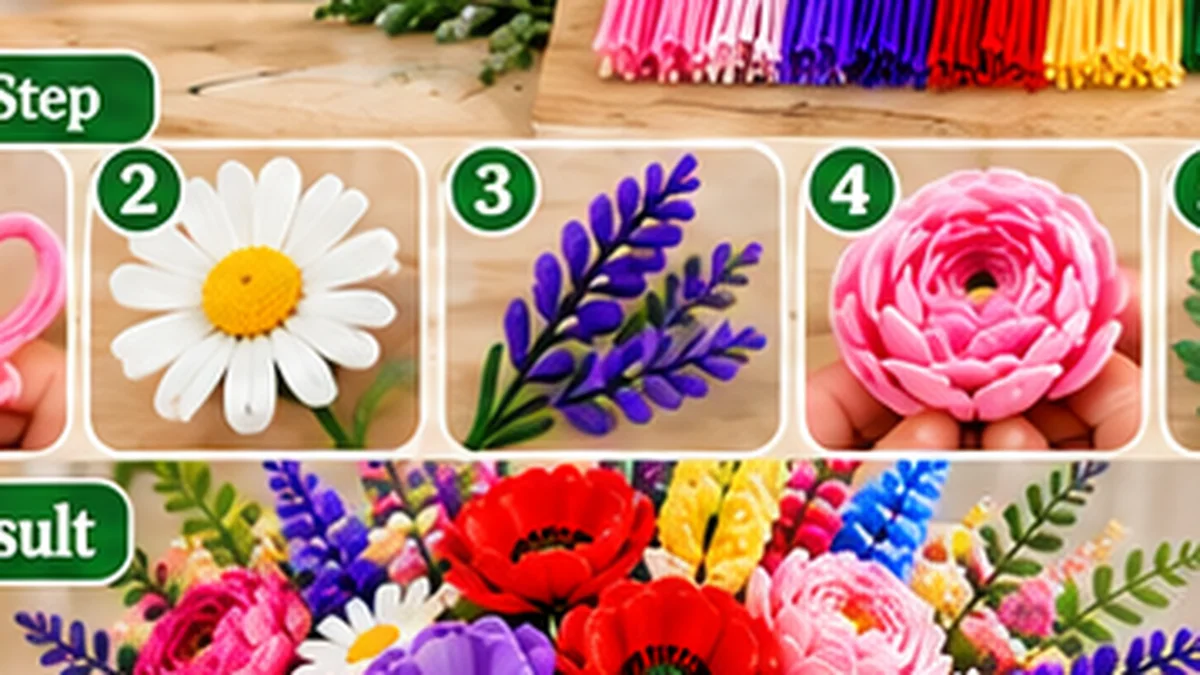
Take one pipe cleaner in your main flower color and bend it into five similar loops. Pinch the base of each loop so the petals stay defined. Twist the two loose ends together at the center. Add a contrasting short piece or a small pom-pom in the middle if you want a visible flower center.
Do not flatten the petals completely. Curve each loop slightly upward with your fingers. That small amount of dimension makes the finished flower look much more natural.
Step 3: Create a Layered Flower
For a fuller bloom, make a second set of smaller petal loops. Place it over the first layer and rotate it slightly so the upper petals sit between the lower petals. Twist both layers together through the center. Layering is one of the easiest ways to make pipe cleaner flowers look more realistic without making the construction difficult.
Step 4: Add the Stem
Place a green pipe cleaner against the back of the flower. Twist it securely around the flower base. If the bloom is large or heavy, place a thin floral wire beside the pipe cleaner before wrapping the base with floral tape. Continue the tape a short distance down the stem to hide the connection.
Step 5: Make Simple Leaves
Fold a green pipe cleaner into a long narrow loop and pinch the top into a point. Twist the bottom of the loop around the main stem. Make leaves in more than one size. Small leaves near the flower and longer leaves lower on the stem create a more believable shape.
Step 6: Make Several Flower Shapes
A realistic bouquet looks better when every bloom is not identical. Combine open five-petal flowers with layered blooms and small rounded buds. You can also create narrow petals by making longer loops and pinching their tips. Keep the construction simple and let differences in size, color, and petal shape create variety.
Step 7: Create Small Buds
To make a bud, coil a short colored pipe cleaner into a compact oval. Wrap a small green piece around its base and attach it to a green stem. Make three to five buds at different heights. Buds help fill empty spaces without making the arrangement look crowded.
Step 8: Add Filler Flowers
Small filler flowers make the main blooms stand out. Cut a pipe cleaner into shorter sections, coil or fold the ends into tiny blossoms, and attach several pieces to one branching green stem. White, cream, pale yellow, and light pink work especially well as filler colors.
Step 9: Arrange the Bouquet Before Tying It
Place the largest flower near the center, but not perfectly centered. Add the other large flowers around it at slightly different heights. Insert medium flowers next, then buds and filler pieces. Turn the bouquet as you work so it looks balanced from the front and sides.
Avoid lining every flower up at the same height. Real bouquets have depth. Let some blooms sit higher and angle a few stems gently outward.
Step 10: Secure the Stems
Once you like the arrangement, hold the stems together firmly and wrap floral tape around the point where they naturally meet. Continue wrapping downward for several centimeters. Trim or bend any uneven ends if necessary.
Step 11: Wrap the Pipe Cleaner Bouquet
Place the bouquet diagonally on a square or rectangular sheet of wrapping paper. Fold the lower corner upward, then bring the side corners around the stems. Leave the flowers uncovered. Secure the paper with ribbon, twine, or a small piece of tape.
For a gift bouquet, layer tissue paper inside kraft or floral paper. For home decor, you can skip the wrapping and place the finished stems directly in a small vase.
How to Make Pipe Cleaner Flowers Look More Realistic
- Curve petals instead of leaving them flat.
- Use several sizes of flowers and leaves.
- Choose related colors rather than a rainbow palette.
- Hide bulky twists underneath flowers.
- Angle stems instead of keeping every stem perfectly straight.
- Mix open flowers, half-open flowers, and buds.
- Use filler sparingly so the main flowers remain visible.
Easy Bouquet Color Ideas
Soft Pink Bouquet
Combine blush pink flowers, cream filler blooms, pale yellow centers, and sage green leaves. This palette works well for gifts and bedroom decor.
Purple Garden Bouquet
Use lavender, deep purple, white, and two shades of green. Add several narrow-petal flowers to give the bouquet a garden-inspired look.
Bright Spring Bouquet
Mix yellow, coral, pink, and white flowers with fresh green stems. Keep the wrapping neutral so the bright colors remain the focus.
Common Mistakes to Avoid
The most common mistake is making every flower exactly the same. Repetition can make a handmade bouquet look stiff. Another problem is adding too many large blooms without leaves or filler, which removes the visual space between flowers.
Also avoid twisting connections so tightly that the petals become distorted. Secure each piece firmly, then shape the petals again after assembly.
What Can You Do With a Pipe Cleaner Flower Bouquet?
Finished bouquets can be used for birthday gifts, Mother’s Day crafts, teacher gifts, desk decorations, party centerpieces, handmade room decor, photo props, and small wedding or bridal shower decorations. Mini bouquets also work well as additions to gift bags and handmade cards.
How to Plan a Realistic Pipe Cleaner Flower Bouquet
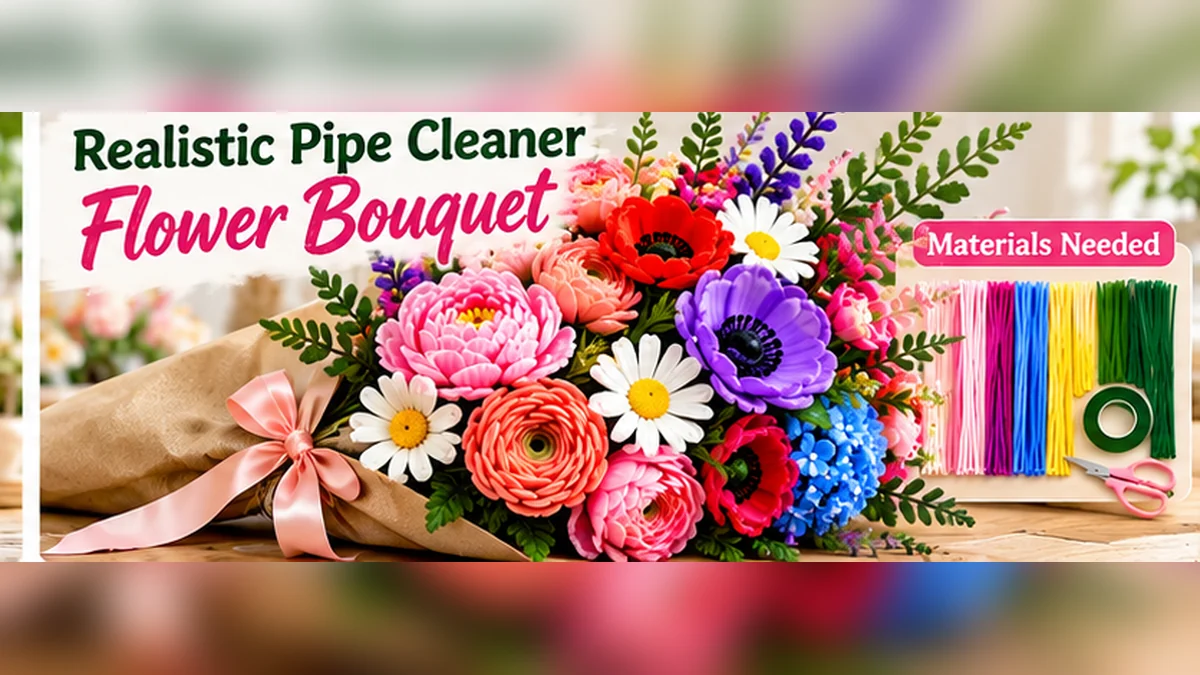
Before making every stem, decide how large you want the finished arrangement to be and where it will be displayed. A small hand-tied bouquet can use three main blooms, several medium flowers, a few buds and light greenery. A fuller vase arrangement needs more height variation and enough foliage to support the outline without hiding the flowers.
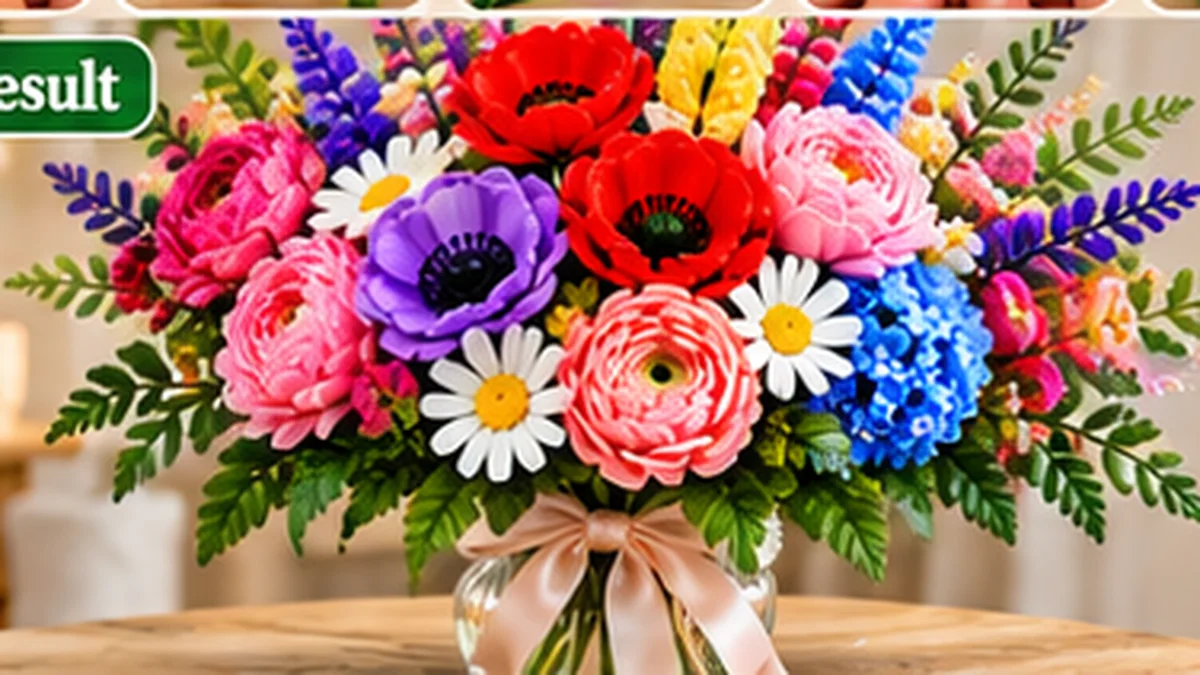
Choose one focal flower first. A pipe cleaner peony gives the bouquet a soft, full center, while a pipe cleaner poppy creates a more open silhouette. Add compact flowers such as a pipe cleaner ranunculus between larger blooms. A pipe cleaner hydrangea can fill a larger rounded area without requiring many separate stems.
How to Balance Height, Shape and Spacing
A realistic pipe cleaner flower bouquet should not form a perfectly flat circle. Start with one or two taller stems, place the main flowers slightly lower, and allow smaller buds or foliage to extend beyond the central group. Turn the bouquet while arranging it instead of judging it only from the front.
Leave small pockets of space between some blooms. Packing every flower tightly together hides the individual petal shapes and makes the bouquet look heavy. If a gap feels too large, add a narrow leaf, a small bud or a light filler branch rather than another large flower.
How to Strengthen Pipe Cleaner Flower Stems
Large chenille flowers can become top-heavy. If a stem bends under the bloom, place floral wire beside the pipe cleaner and wrap both together with floral tape. Start the wrap directly beneath the flower head, where the connection needs the most support, and continue downward with overlapping turns.
For a bouquet that will be placed in a vase, keep the lower stems relatively straight. For a hand-tied arrangement, gentle bends can make the flowers look more natural, but make those bends above the tying point so the stems still gather neatly.
How to Finish the Back of Each Flower
The underside matters when the bouquet will be viewed from several angles. Cover visible twists with green sepals or a short floral-tape wrap. Position leaves so they emerge naturally from the stem instead of covering the flower base completely. After assembling the bouquet, inspect the sides and back and reshape any pieces that were compressed while tying.
How to Store a Handmade Pipe Cleaner Bouquet
Keep the finished bouquet dry and away from strong direct sunlight, which can fade some craft materials over time. Dust can usually be removed gently with a soft brush or cool air. If the arrangement becomes compressed during storage, separate the stems first and reshape petals individually rather than pulling the whole bouquet outward at once.
For gift transport, use tissue paper around the flower heads and a firmer outer wrap around the stems. Avoid placing heavy objects on top of the bouquet because layered petals can lose their curves.
Choosing Flower Sizes for a Balanced Bouquet
Use three visual sizes rather than making every bloom identical. Let the largest flowers act as focal points, medium flowers connect the arrangement, and small buds or filler pieces soften the edges. Before tying the stems, hold the bouquet at arm’s length and check whether one side feels heavier. Move a medium flower before adding more material.
Pipe Cleaner Bouquet Troubleshooting
If the bouquet looks stiff, vary stem angles and flower heights. If it looks crowded, remove one large bloom and replace it with foliage or a bud. If individual flowers disappear, separate neighboring blooms so their outlines remain visible. When wrapping causes the arrangement to close inward, loosen the tie slightly, reposition the outer stems, and secure it again.
For a bouquet that will stand in a vase, test the arrangement in the container before the final tie. The vase opening changes how widely the stems can spread, so a bouquet that looks balanced in your hand may need a few adjustments once displayed.
FAQS
How long does it take to make a pipe cleaner flower bouquet?
A small beginner bouquet can usually be completed in one craft session. The exact time depends on the number and complexity of the flowers.
Do pipe cleaner flowers need glue?
Not always. Many flowers can be secured by twisting the stems together. Glue is optional when you want to reinforce centers or decorative details.
What size pipe cleaners are best for flowers?
Standard craft pipe cleaners work well for most beginner flowers. Longer stems are useful when you want tall bouquet arrangements.
How do you keep pipe cleaner flowers standing upright?
Use a full green pipe cleaner for the stem and reinforce heavier flowers with floral wire if needed. Wrapping the connection with floral tape also adds stability.
Can kids make pipe cleaner flower bouquets?
Yes. Simple loop-petal flowers are suitable for many children’s craft activities with appropriate adult supervision, especially when scissors or hot glue are involved.
Final Tips
The key to a realistic pipe cleaner flower bouquet is not complicated construction. It is thoughtful shaping and arrangement. Vary the bloom sizes, curve the petals, add a few leaves and buds, and place the stems at different heights. Start with a small bouquet, then experiment with more detailed flowers as your confidence grows.
5 thoughts on “How to Make a Realistic Pipe Cleaner Flower Bouquet”